| All you need to know about Carpenter's Square-22 |
|---|
 Previous | Index | Next Previous | Index | Next  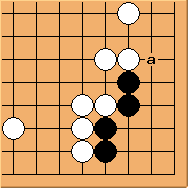 Diagram 22.1: White to play We already learned that attacking at 'a' from outside is not working. What else? 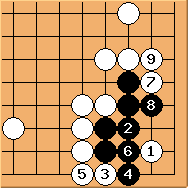 Diagram 22.2: Solution
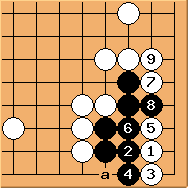 Diagram 22.3: Variation If 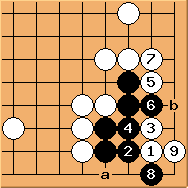 Diagram 22.4: Variation
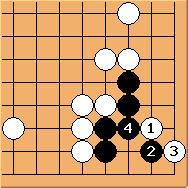 Diagram 22.5: White fails
Conclusion: This shape is quite simple. As long as white gets the key 2-2 point, black has no chance. Previous | Index | Next |
 is urgent. If
  connects,
after forcing moves
connects,
after forcing moves  and
and  ,
,
 simply reduces the eyespace to kill.
 at 'a' is useless too.
 , 'a' and 'b' are miai points.