| All you need to know about Carpenter's Square-34 |
|---|
 Previous | Index | Next Previous | Index | Next  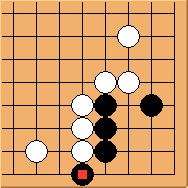 Diagram 34.1: White to play The corner is much stronger with the first-line hane at  Diagram 34.2: White fails Because of 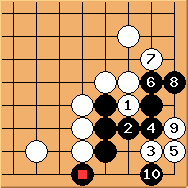 Diagram 34.3: White fails If 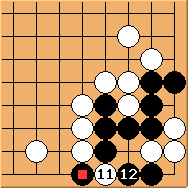 Diagram 34.4: Seki To continue from the previous diagram, the only thing white can do is to make 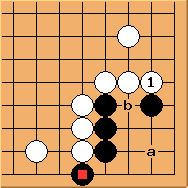 Diagram 34.5: Can white form a ko? Since white cannot kill the corner, an outcome of ko would be the next best. White hopes black to play 'a' so that Diagram 33.3 applies; or if black playes 'b', white can choose one of the ko options in Shape 7. However, black has better defence. 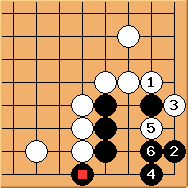 Diagram 34.6: Black alive
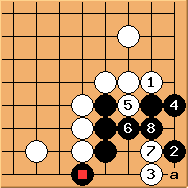 Diagram 34.7: Black alive If 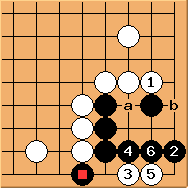 Diagram 34.8: Black alive If 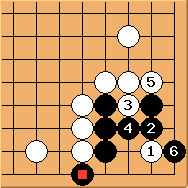 Diagram 34.9: Black alive If 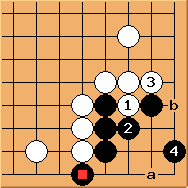 Diagram 34.10: Black alive If white makes 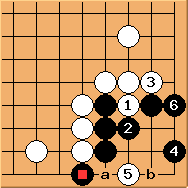 Diagram 34.11: Black alive To reply 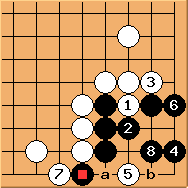 Diagram 34.12: Black alive To reply 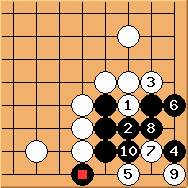 Diagram 34.13: Black alive Finally, To summarise: with the first-line hane, black corner is very safe. The best white can get is seki in Diagram 34.3 and 34.4. Black needs to know the 1-2 point tesuji. In very rare cases, white may consider Diagram 34.13 (see how a double-ko may be exploited in this pro game). Previous | Index | Next |
 . Can white do anything?
 occupies this key point first,
  is a good move.
 /
/ exchange.
Please confirm the corner is a seki.
exchange.
Please confirm the corner is a seki. is a famous tesuji! If
  , black occupies the second 1-2 point and there is just enough room to make two eyes.
 is good, recovering Diagram 34.2.
 ,
,  is still the best move.
White has a number of options. Clear 'a' and 'b' are miai points.
is still the best move.
White has a number of options. Clear 'a' and 'b' are miai points. ,
,  is calm, still leaving 'a' and 'b' as miai.